I got a new camera a few weeks ago! My old one was just getting old and starting to not work right. I'm still learning how to use this one, but it's been fun so far.
My hydrangea has started to bloom. This plant is from a cutting my grandma took from one of the plants we used to decorate at our wedding. Love that.
I made chocolate-cherry ice cream (I have a photo of the actual ice cream, but I think it's still on the camera.) Cherries are so pretty; these were cooked into a candied cherry syrup. I haven't made ice cream since last summer, I think. Working on remedying that.
I also made a sweater/jacket for a friend's new baby girl (who made her entrance to the world yesterday!) 100% cotton, pattern from Little Crochet by Linda Permann. I've made two patterns from this book so far and both were very cute. I need to work on choosing a yarn weight that fits the project ahead of time, though, I've had to make alterations for sizing both times because I chose heavier yarn than what was called for.
And the thing taking up most of my sewing time right now is curtains for our living room. We have woven wood blinds/shades right now, which I really like the look of, but they don't totally block the light. I also just wanted drapes - something to add some color or pattern or something. I'm making lined pinch-pleated draperies out of a small scale black and white gingham I bought from Fabric.com. It's coming along fine so far, but they're much more time-consuming than I anticipated. Working with these big pieces of fabric take a lot of space (and pins!)
So that's part of my summer so far. An update on the Palette Challenge will be posted soon!
Showing posts with label home. Show all posts
Friday, June 15, 2012
Monday, January 30, 2012
New Puppy
This is Scout. She's currently laying next to me fighting a stuffed ladybug. She's the one responsible for taking up all my extra time lately.
Monday, December 5, 2011
December's Here
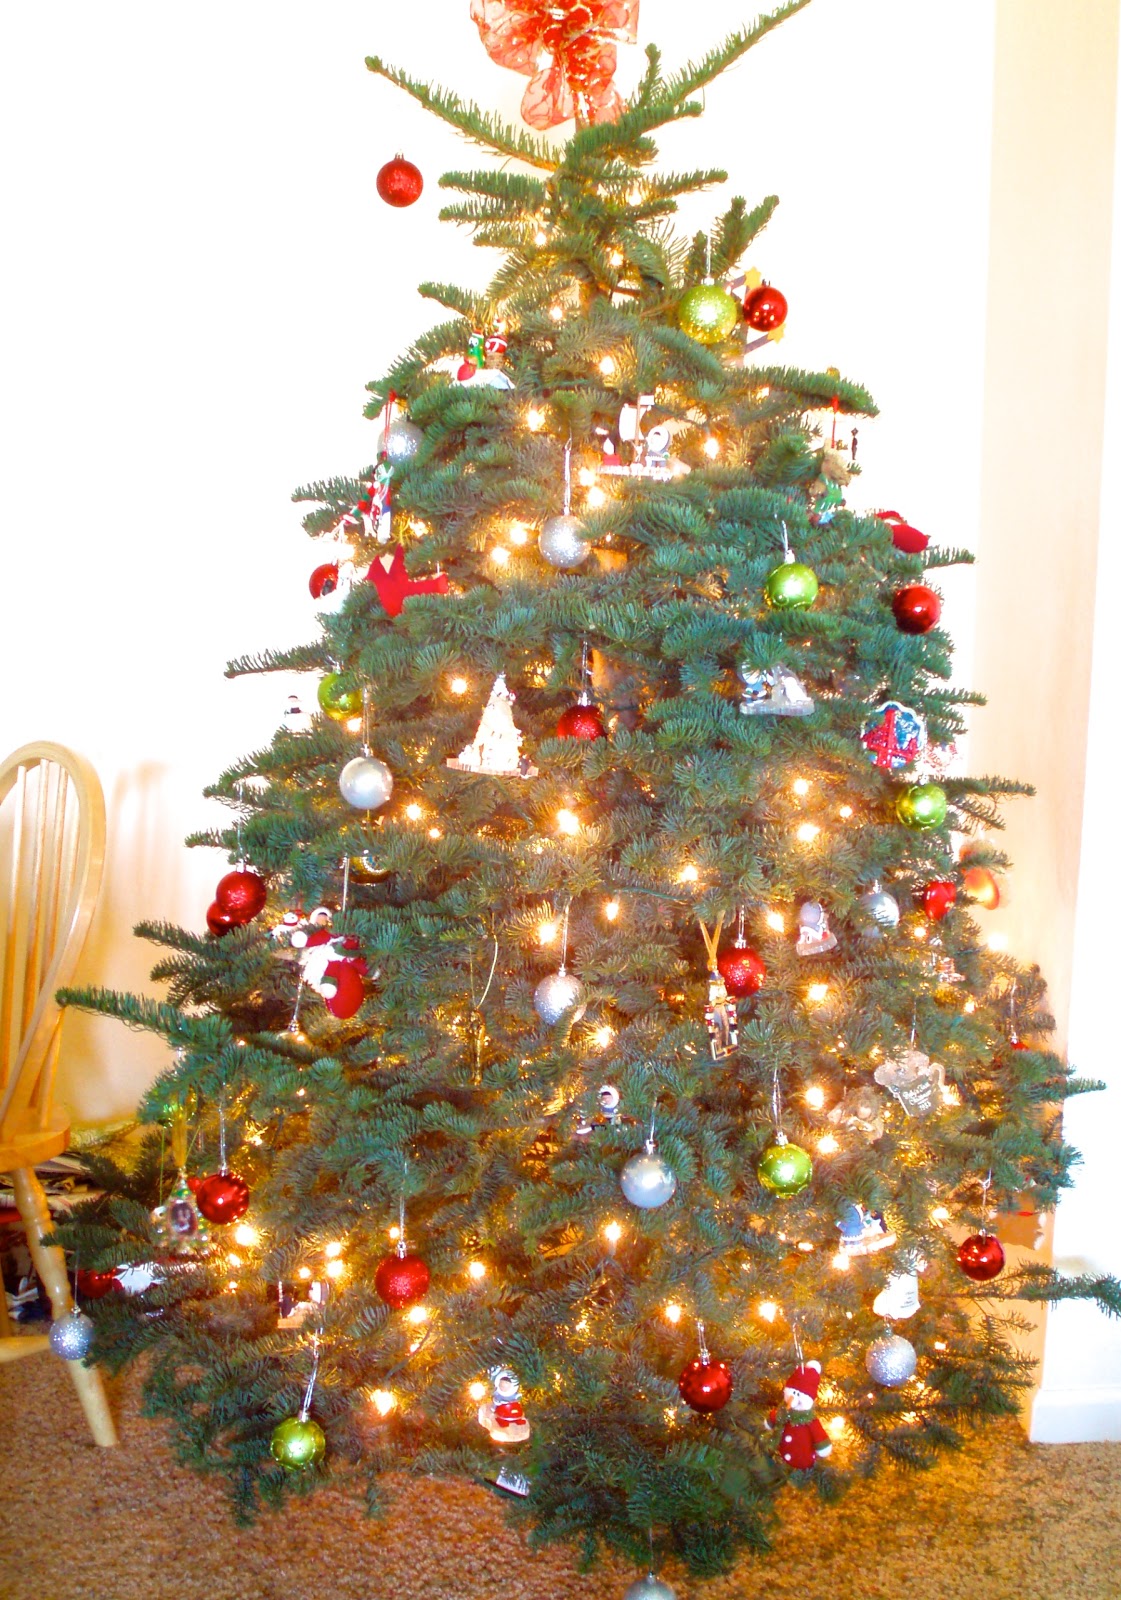
We got our Christmas tree. It still looks like this: http://twitter.com/#!/SmithAndDaphne/status/143506713260199938 (undecorated). I swear it grew when we carried it through the door.
I found my camera + tripod connector foot thing, but haven't been taking many pictures.
I sewed one Christmas stocking last night, hopefully I can make the other tonight and also add a bit of width to our tree skirt.
It's officially winter - we have eaten both Brussels sprouts and clementines. I'm finding myself eating more seasonally - coming back to certain foods at certain times of the year. Paying more attention to what's good when.
I planted a few bulbs yesterday - it was tough to dig some of them far enough into our "soil" - not because it's frozen or anything like that, but because it's basically rock and cement chunks after the first few inches. Another reason I want to sheet mulch. I may try forcing some of them indoors - need to figure out how you're supposed to do that.
It's starting to become that busy time of year. I'll have to remember to pull out the camera and record some of it. So bad at that.
Sunday, November 6, 2011
The Usefulness of a Tripod
I have things to share, but no pictures of most of them... I can't find the little thing that holds the camera onto the tripod, so it's kind of difficult to get decent pictures right now. It's getting too dark by the time I get home from work to have any sort of natural light anyways, but I can't even take pics in the morning. For example, I finished my pink jersey skirt and wore it the other day, but... no pictures. I also finished my crocheted neckwarmer, but no pictures... See the theme?
I also picked up a bunch of supplies for Etsy goods this weekend, which are in various states of being washed/dried/just waiting. I use quite a bit of reclaimed materials, such as the vintage (and non-vintage) handmade doilies, wool sweaters for felting, even fabric remnants. I think it's great to use second-hand materials when possible, but I only use things that I can clean and feel that the quality is like-new. I do use a lot of brand-new materials as well, and I like that mix of old and new.
And on a third unrelated note, we're working on our front yard. That is, it's sort of on pause right now, because I'm waiting on other people. But two weekends ago, I spent a good part of my Saturday hauling bags of leaves from a local school to my backyard. I'm planning to sheet mulch our front "lawn," which is basically layering organic materials over it to smother what's growing there now (mostly weeds) and provide a base for new plants above. The stuff we lay down will decompose, and on the very top will be wood chips to be a little more attractive and weigh everything down. So, right now my back yard has:
forty-three bags of leaves. All nicely bagged by volunteers at a school clean-up day. Win-win.
Thursday, October 6, 2011
And then there was MY anniversary gift...
For our anniversary this year, my husband bought me a Kindle! I haven't used it much yet, because I was trying to finish Lonesome Dove - that book is almost 900 (!) pages, but since I borrowed it from the library, I only had 3 weeks to read it. I kept it, um, longer than 3 weeks, but I finally returned it today. Still didn't finish... I think I'm just going to buy it used.
Anyways. What I really wanted to share was the case I sewed up for the Kindle. Ignore the blurriness of the pictures - the only day I actually remembered to take pictures, by the time I got home and took them it was getting dark and my camera wasn't liking that.
I used a black and cream, large houndstooth print, home decor weight fabric that I bought a long time ago as a remnant. I lined it with wool felt from a failed Christmas tree skirt project (also used in my wreath). FYI, if you try to felt felt (re-felt it? extra-felt it?) it might come out a bit ruffly and wavy. I tried to iron it, block it, etc and nothing really worked. Small pieces are OK, but nothing big. It is nice and thick, though, so it was perfect to give some protection here.
I'm rather proud of just how nicely the Kindle fits. It's snug but not tight, completely different than my past attempts at similar things. I tried to make a little case for my cell phone (at least two or three times) and it always came out way too small. WAY too small. This came out nicely, though. Snug and cozy... nice and autumn-y.
Monday, January 17, 2011
The Vacation Routine
Well, we're home. I've been busy trying to settle back into daily life, and I'm trying to make a few things to put into my Etsy shop (I took out the Christmas stuff and now it's even smaller than it was!)
Vacation itself was 6 days at the snow - Truckee, CA, near Lake Tahoe. My husband and I rented a cabin with my parents and my brother and sister-in-law. It was absolutely wonderful to have a break where we could just relax. A typical day went like this: wake up. eat breakfast. sit around for a while, maybe do some crocheting. change into snow clothes and go sledding. eat lunch. watch movies and crochet. eat dinner. play a game or watch a movie.
I spent quite of bit of time on vacation just working on WIPs; will share about those later (ie, after I take some pics). My mom and I also (very fun) taught my sister-in-law how to crochet! If we'd had Internet access we would have tried learning to knit, but the crocheting was fun. There was a local yarn shop that we stopped by called Lake Tahoe Yarn Company. They were super helpful and had some lovely yarns. I spent a ton of time trying to decide what to get. Or rather, what not to get (as previously mentioned, I'm rather indecisive.) If you're in the area, you should definitely stop there.
All in all, quite a nice way to spend a few days.
Wednesday, January 5, 2011
Who's Ready for a Vacation?
January 13:
***Um, so apparently I never posted this! Better late than never, I guess? At least it makes what I was going to post about how vacation went make more sense***
January 5:
I am! And coincidentally (or not so much), I'm leaving for one tomorrow - woo hoo! The husband and I are going up to Lake Tahoe with my family for 6 days. I don't know whether or not I'll have any sort of Internet connection, so I may pop up on Twitter or something but I'll be taking a blog break.
Before I go, here's a super quick little how-to add-on to the crocheted Christmas trees I posted a while back: I totally forgot to mention the little dots on the garland chain! If you know how to crochet, even just a tiny bit, this is an easy way to make a simple yarn garland. I simply chained for a while (it's really your preference, it's just spacing and will change depending on your yarn and hook) then made a little circle by doing one round. For the Christmas garland, I attached the trees in between dots, but you could also just leave off the trees and have a simpler finished product.
You create the dot by chaining, then going back to the 3rd or 4th chain from the hook, slip stitching into it to make a tiny little ring, and then doing double crochets into that space in the middle of the ring - do a small ch-2 as the first "double-crochet" stitch to bring your yarn up to the right height. I think I used 9 DC's for kind of cupped discs, but using 8 will flatten them out if you want. This is a pretty good tutorial (pictures and all!) if you haven't done this before. When you get enough of them to make a good circle, slip stitch into the first stitch (whether that's the first "real" DC or the turning chain doesn't make a huge difference here) and start chaining again. Keep doing this as many times as you want to get the length of garland you need.
I also found these instructions a while back and thought it was really interesting. I didn't know how to create anything in the round without following a pattern, because I didn't know the pattern for the increases. But, it's pretty simple and opens up all sorts of ideas for me.
I want to use this garland technique to make some big, long garlands. Just one of many things I want to do... Planning on using some vacation time for crocheting along with finishing the binding for the baby quilt. Soooo looking forward to just chilling for a few days. Will share finished projects when I get back!
Saturday, December 25, 2010
Merry Christmas!
We got our first Christmas tree this year. This is our fifth Christmas together (married), but for two of them, we weren't home for Christmas, one of them we weren't even on the same continent, and last year we were staying in my in-laws vacation home and didn't want to bring a tree and all its mess into it. With all the last-minute craziness that's been going on this week, I don't have any updated pictures of the tree - I made a tree skirt (well, halfway made) and it had some presents under it, but at least I got something photographed!
I also collect ornaments as souvenirs; this is from our honeymoon:
Got this one at the King Tut exhibit in San Francisco last year:
And these are ornaments I've been collecting for... 18 years? That seems like a really long time. My grandma always bought them for me when I was growing up; after she passed away, my mom bought me one and I'm trying to find this years'. I think I'll be ordering it online at this point; time got away from me and the ornament displays are pretty much cleared out.
I love that my tree is filled with memories. Here's to a very Merry Christmas and lots of great new memories!
![]() |
| Notice the chair: That's how close the tree is to our dining room table |
I also collect ornaments as souvenirs; this is from our honeymoon:
Got this one at the King Tut exhibit in San Francisco last year:
And these are ornaments I've been collecting for... 18 years? That seems like a really long time. My grandma always bought them for me when I was growing up; after she passed away, my mom bought me one and I'm trying to find this years'. I think I'll be ordering it online at this point; time got away from me and the ornament displays are pretty much cleared out.
I love that my tree is filled with memories. Here's to a very Merry Christmas and lots of great new memories!
Monday, December 6, 2010
Wreath 2010
I finally made my wreath this weekend. I actually bought the wreath form back in October, and I was going to use it for an autumn wreath bedecked with felt and whatever other embellishments I could find around here.
Instead, it sat around until Christmas. I kept it pretty simple; I would like to make the hanger fit in a little better but don't have any good ideas for it right now. I used a grapevine wreath form ($1), wrapped it in strips of grey wool felt leftover from trying to trim down some wonky squares (that's another story), and added felt leaves and berries.
I used masking tape to attach the felt on the back. The green and cream felt is just acrylic craft felt that I freehand cut into the shapes I wanted, and then I glued them to the grey felt with craft glue.
At first, the "D" in the center was hanging from the wreath by monofilament, but it's so light that it kept flipping around. I put some blue tacky stuff on the back and stuck it straight to the door. It's just a little wooden letter I found at a craft store and painted grey. Simple and easy!
*Also check out Rachel's wreath - it's super cute! *
Friday, December 3, 2010
Finally, some decorations are up
I did a little Christmas decorating last night. I finally took down my pumpkins and little Thanksgiving pilgrims and pulled out my boxes...
At that point, I realized that I don't really have very many Christmas decorations. Also, we live in a 1-bedroom apartment, so there's not a ton of extra space. Luckily, those two things work out well enough. We're going to go get our tree this weekend - since the majority of my Christmas boxes really just have ornaments in them, at least it will be well-covered in decorations.
There was one thing I made last year that I was looking for, and I finally found it at the bottom of a box. It's this little frame with some Smooshy Stack Trees inspired by Lolly.
Lolly's instructions are great, so click the link above if you want to see how to make them. For my trees, I only used two fabrics, a red and a green polka dot. I made sure the green was on top for all of the trees. I made 5 trees in all, and I think two of them might be the same size but the others are all different. I backed it all in a red and white paper that I had.
In the middle, I added a chipboard "peace" that I probably picked up for $1 at Michael's or something. I put it all on a frame that I had sitting around; it's not made for 3-d objects so the trees are kind of flattened down in there and I had to put masking tape all around the back to hold everything in place. But it works! I just didn't want to spend money on a new frame. It also wasn't a planned-out project; I just sat down one night and decided to make it. But I love it!
It's a fun little accent that I can put basically anywhere, and I love how the glitter looks with Christmas lights near it.
At that point, I realized that I don't really have very many Christmas decorations. Also, we live in a 1-bedroom apartment, so there's not a ton of extra space. Luckily, those two things work out well enough. We're going to go get our tree this weekend - since the majority of my Christmas boxes really just have ornaments in them, at least it will be well-covered in decorations.
There was one thing I made last year that I was looking for, and I finally found it at the bottom of a box. It's this little frame with some Smooshy Stack Trees inspired by Lolly.
Lolly's instructions are great, so click the link above if you want to see how to make them. For my trees, I only used two fabrics, a red and a green polka dot. I made sure the green was on top for all of the trees. I made 5 trees in all, and I think two of them might be the same size but the others are all different. I backed it all in a red and white paper that I had.
![]() |
| I decided to put it on our bookshelf for now, since that seems to be my central point for Christmas decor |
It's a fun little accent that I can put basically anywhere, and I love how the glitter looks with Christmas lights near it.
Monday, November 8, 2010
China Accents
I was browsing on the West Elm website today, and I saw these plates:
Aren't they pretty? I love how the leaf shapes are authentic and organic, but they're done in a shimmery gold. That sparkle mixed with nature is great. My china is the Noritake Crestwood Platinum, and I think that mixing the gold and platinum would be really fun for the holidays. This would work just as well for Thanksgiving as it would for Christmas, too, because it's not a holiday-specific design.
I actually think I got something in the mail from West Elm recently... I should go find that, it might be a discount that tempts me into buying them!
Hostess with the Mostess has some cute gold & silver ideas, such as this:
I really like this centerpiece, too:
And mercury glass, I have to get some of that:
Aren't they pretty? I love how the leaf shapes are authentic and organic, but they're done in a shimmery gold. That sparkle mixed with nature is great. My china is the Noritake Crestwood Platinum, and I think that mixing the gold and platinum would be really fun for the holidays. This would work just as well for Thanksgiving as it would for Christmas, too, because it's not a holiday-specific design.
![]() |
| Noritake Crestwood Platinum |
Hostess with the Mostess has some cute gold & silver ideas, such as this:
I really like this centerpiece, too:
![]() |
| Martha Stewart |
And mercury glass, I have to get some of that:
![]() | |
| West Elm again |
Wednesday, October 27, 2010
His and Hers Pillowcases
A while back, I decided to make a "his and hers" set of pillowcases. I saw a floral flannel that I liked, but didn't think hubby would be too fond of the coral-y pink and the flowers. So I bought him a circle print.
Now that it finally feels like fall, I really wanted to get these pillowcases finished. I bought the two main fabrics a while back, but it was on a whim and I didn't really know how much I needed. Once I washed it up, I saw that I needed just a little more to get them the right size. I decided to make the cuffs match each other to bring the two cases together a little bit. There was a big sale at Joann this weekend, and since I was there anyways I bought the last little bit I needed. This was a pretty quick project, and I did hardly any measuring and only a little cutting. The construction is simple, too.
I used 3/4 yd of the "main" fabric on each one, plus 1/4 yd of the contrasting cuff (so 1/2 yd total of contrast for 2 pillows [or] 1 yd total per pillowcase). I washed it all first, then trimmed it up to make everything straight and make the two main fabric pieces the same size. I just cut the contrasting fabric in half (lengthwise - to get 2 long strips). I don't know what size I ended up with, but pillowcases are pretty forgiving so let's not worry about that.
I decided to use French seams to keep everything nice and enclosed. I also hadn't used French seams before and wanted to see how it went. I started by lining up one cuffed piece (folded in half, wrong sides together) with one body piece - keep wrong sides together first, and line up the raw edges. Sew along that edge (3/8" allowance?), then flip them around so right sides are together, like usual. Sew along there with a slightly bigger allowance (or trim the 1st one down and sew with the same allowance, but I didn't want to mess with trimming, etc). It helps to press the seam open after the 1st step, then press it again when you flip it so that 2nd seam is smoother.
You'll end up with a nicely enclosed seam. That's the finished seam between cuff and body below. (I didn't take pics of the other pillowcase because I sewed it right sides together to start and didn't want to rip the seam out. So it has one "regular" seam, haha).
I did the bottom seam next, exactly the same way (make sure it's all lined up, sew with wrong sides together, then right sides together). Then I trimmed everything before I sewed the side seam, because I must sew crooked and my sides weren't lining up nicely. :)
See how you have an ugly outside seam for a while? That's what you want for the first step. I am always messing up on right sides together/wrong sides together/make sure things match/etc etc. I had to keep reminding myself to do it this way, which is why the first seam on "his" pillowcase isn't a French seam.
You're all done! Just three seams to sew (6 if you count the inside out/outside in/doubleness of French seams).
Stuff with pillow.
Admire your new sew of pillowcases. (Ignore how they don't match the rest of your bedding).
Enjoy the lovely snuggliness of flannel.
Monday, October 4, 2010
Love These

I saw these pillowcases somewhere a while back, but I can't remember where it was. Oh well. I love them, looked them up, saw how much they cost (for pillowcases?), and decided it was a no-go. Then I kept thinking about them and decided to go ahead and buy them. And I think they're lovely. Haha.
Friday, June 25, 2010
Bookcase - Finished!
The bookcase is finished! Don't look too closely or you may question my use of the term "finished"... But it looks complete enough and is fully functional so I'm done!
Note to self: Do NOT let the guy who made the wrong cuts pick out new pieces for you. He has shown his incompetence in cutting and it may carry over to his 1x4 choosing - and you might get several pieces of curvy, crooked, junk wood. Which you cannot make straight by trying to nail the heck out of it. Please don't look at the side of my bookcase.
see the other side, but it is stained - and facing this way, would be against
the floor. Had to pull that apart and redo it.
I did like making this, though! I learned several things (see above), including a lot about staining, drilling, and following your plans! I had to make a few adjustments due to my own forgetfulness. I forgot to attach two pieces in the right order, and unless I was going to try to pull them back out I had to just go with it. I didn't realize until later that that meant I had to alter several other pieces also, but hey - it holds books.
pine, so I used the pre-stain conditioner, too, which worked well.
I also made some fabric baskets to hold our bits of stuff that didn't have a home. It added some nice color to our beige rental. The blue and green vases I got from Cost Plus when they were giving away gift cards for helping review their website - they've been boxed up for over a year, waiting for a place to belong. The little owl was something my Dad brought me from a trip to Italy, and it sat on my desk in college. His beak is broken, but I think it just gives him character. :) I made sure the bottom shelf could hold binders, since we have several and they're kind of hard to store. It was really nice to be able to customize everything.
I realized we have way too many books for one bookcase, though. I actually suspected that already, since this is what we had in our old apartment:
Two bookcases. But this being my first building project, my hubby thought one would be more practical than two. I'm sure one got completed much more quickly than two, and even that took plennnnty of time. So, it turns out he was right (shhhh...).
Also - this bookcase was practically free because we bought it with a gift card we got with our credit card rewards. Score! Can't wait to try something else from Knock-Off Wood. I'm thinking some nightstands are in order... Perhaps something like this?

One item checked off the list, another one added.
Monday, May 17, 2010
Adding Details
This weekend was nice and productive! I didn't have plans over the weekend (for the first time in a while), which gave me time to just work on things around home. The bookcase is completely built and in place, it has books on it, things are getting put into their "real" places around the apartment, and I even got to buy some new fabric. We've had our main furniture set up (ie, couch and TV) but the dining table is in the middle of our main space, sort of between the living room space/dining room space, and not much decorating has gone on around here. I'm almost done putting everything into the bookcase; the last step is some fabric boxes to store some loose odds and ends. I made one box tonight, and I have everything ready to get the other three done. This is the fabric:
It was kind of a last-minute decision, but I really like it. I tend to spend WAY too long shopping for everything, and this was no exception. I was in a hurry to meet my parents at Starbucks, though, and I had to just pick something. Worked out well!
Tonight was the first time I'd used my sewing machine in about a year and half - it felt good! I've been using my mom's machine, but even then it's been a few months since I've sewn anything. More projects are on my mind to work on soon - we'll see when they happen... Hopefully the boxes will be finished tomorrow. They're adding some nice color to our beige-y living room.
Monday, May 10, 2010
Settling In
I have several WIP's going on right now, and I keep thinking about (and planning) more. We're still settling in to our apartment and trying to find places to put everything is still a challenge! Right now, my biggest project is a bookcase. We sold ours before we put everything into storage two years ago, and when we found the apartment a few months ago, I started looking for replacements. Bookcases are expensive!
Then one day, I came across Knock-Off Wood. It is one of my new favorite sites! Ana builds furniture, provides free plans, lives in Alaska (my birthplace!) and is generally just awesome. I'm working on this. When it's finished (someday) I'll get some photo evidence.
In other news, we watched Iron Man on Friday night and went to see Iron Man 2 on Saturday. Liked them both!
Wednesday, June 10, 2009
Swallowfield
Over at WiseCraft, Blair has started having monthly sponsors. This month the sponsor is Jen Judd-McGee of Swallowfield. The previews on WiseCraft tempted me to wander into her Etsy store, and now? Well, now I'm trying to decide what I want.
I recently found a gift card from Christmas that I'd thought was long gone (I have a tendency to put things in weird places and find them months later....) so I designated part of it as "Etsy money." The problem with vague "Etsy money" is that there are far too many things I like on Etsy. Swallowfied, though... Like I said, I'm trying to decide what I want. It appeared in the right place at the right time. I'm fond of the collages, such as this one:

However, I think my budget is running more towards prints. (Check out WiseCraft for some special offers!)


I recently found a gift card from Christmas that I'd thought was long gone (I have a tendency to put things in weird places and find them months later....) so I designated part of it as "Etsy money." The problem with vague "Etsy money" is that there are far too many things I like on Etsy. Swallowfied, though... Like I said, I'm trying to decide what I want. It appeared in the right place at the right time. I'm fond of the collages, such as this one:
However, I think my budget is running more towards prints. (Check out WiseCraft for some special offers!)
Subscribe to:
Posts (Atom)